Echelon Networks
Images
About the App
For my 3rd year semester 1 placement I decided to do it with a company called Echelon Networks.
The app idea was that people could search schools for their children, give rating and reviews
to the schools. People will be able to look thought many school profiles and see which one is the
best for their child. They could check for recent activities going on in schools. The school search
would be very extensive and it also had the ability to search for schools in your nearby area or
in a different city. However, this is one 1 of the aspects. The 2nd aspect was that there will be
a fun learn center where educational games would be designed for kids and their responses would be
mapped. The 3rd aspect is broadcasting system where you can find resources like videos, talks and
seminars on good parenting foe parents, how to be an independent learner for students, what are
the new and engaging ways of teaching for educators and so on. Experts on these subjects would be
invited and asked to share their experiences and learning. The 4th aspect is the job portal.
This is where jobseekers can look for jobs in the education sector for e.g. teacher or other
staff jobs. Schools will post jobs and the app will provide suitable candidates. The 5th aspect
is the shop where parents could by school stationery, uniform and other necessary products and
services required for their children.
Target Audience
The app is targeted at parents, teachers, students, investors and job seekers in the education sector.
Now these services are already available as individual apps or service website. However, what
sets this app aside is that it offers all these services mentioned above in one place and becomes
a hub for educational services.
My Role
I have been appointed as the project leader for this project and I intend to work with the
company over my winter break. I was involved in the overall development of the app which
includes design, development, app concepts and future plans for the app.
Development
I started off with development of the app. I am a VR developer and as this is not a VR application,
I can not use Unity to create this app. I have never created an application that requires to post and
retrieve data from a database and this was my first time creating an app of such nature. Hence,
I had too look for an alternative. I began with a software called Xamarin. It's a software
that uses C# as it's coding language. This was a new software to me so first I had to learn what
I could do with it. I was familiar with the scripting language as I had started using C# in Unity
however, C# in Unity is a little different than C# in Xamarin so I had to get use that.
Development with Xamarin
So I started playing around with Xamarin and started to learn how save and retrieve data from the
local storage of the device. Since this was a mobile app I was trying and testing how could I save
and retrieve data from my mobile's local storage. One of the biggest challenge with Xamarin was that
there were not a lot of resources for it and it really took me a while to search and figure out how
to achieve anything in Xamarin. I felt that Xamarin is not a very popular software as there were very
little tutorials and resources.
First I had to create a home screen which gave very basic functionalities such as create a database,
add information to it, retrieve it and finally delete it. This page had to be linked with a main
activity script which monitors and manages this screen. [Refer to Image 1] Then I had to create a
new script class called "DBRepository" which created a folder in my device's storage where all my
data could be stored and later retrieved. The main activity script basically tells the app how to
create and where to save a database containing information. For my app I planed to use this for
saving user's username and password so that they don't need to sign in every time they open the app.
The device would remember their password and automatically logs the user in. A functionality used by
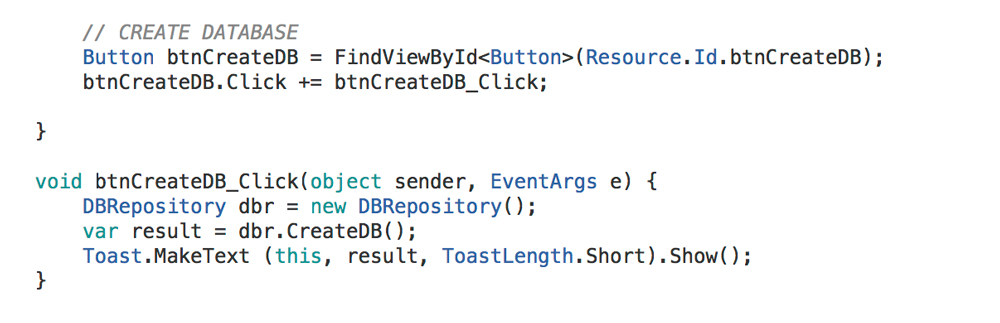
Facebook and Twitter. [Refer to Image 2] Then in the main activity I added an action to my
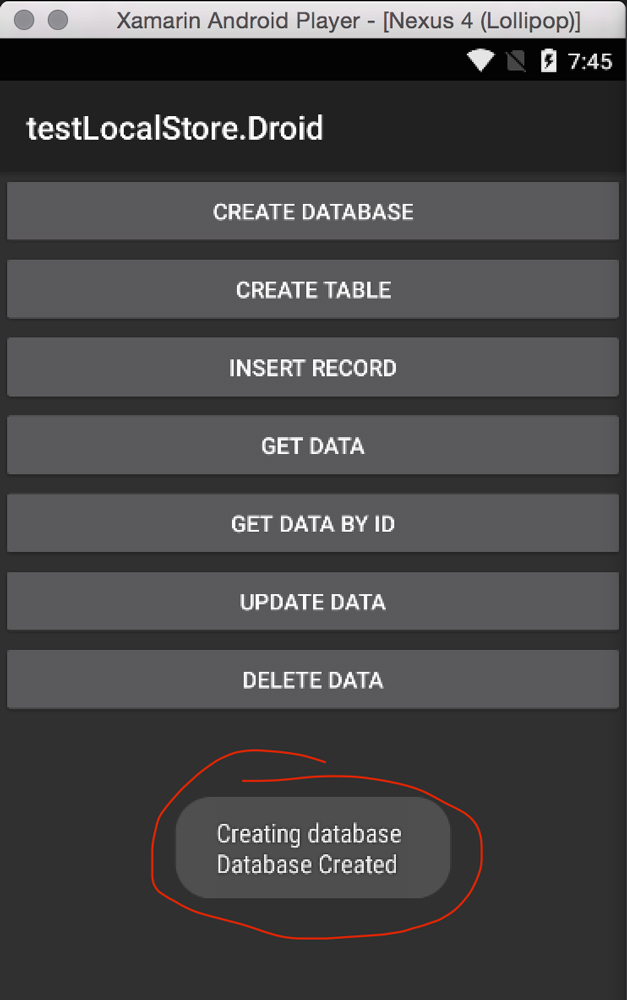
"Create Database" button so it would create a new database. [Refer to Image 3] Later I checked if
it was working and it was working perfectly. [Refer to Image 4]
After that I had to create tables in by database so all my content would be organized and then start
adding a list of information to it. I would start by saving simple text data in the local storage.
First I created a new page so the user can enter some text that will be saved in the local storage.
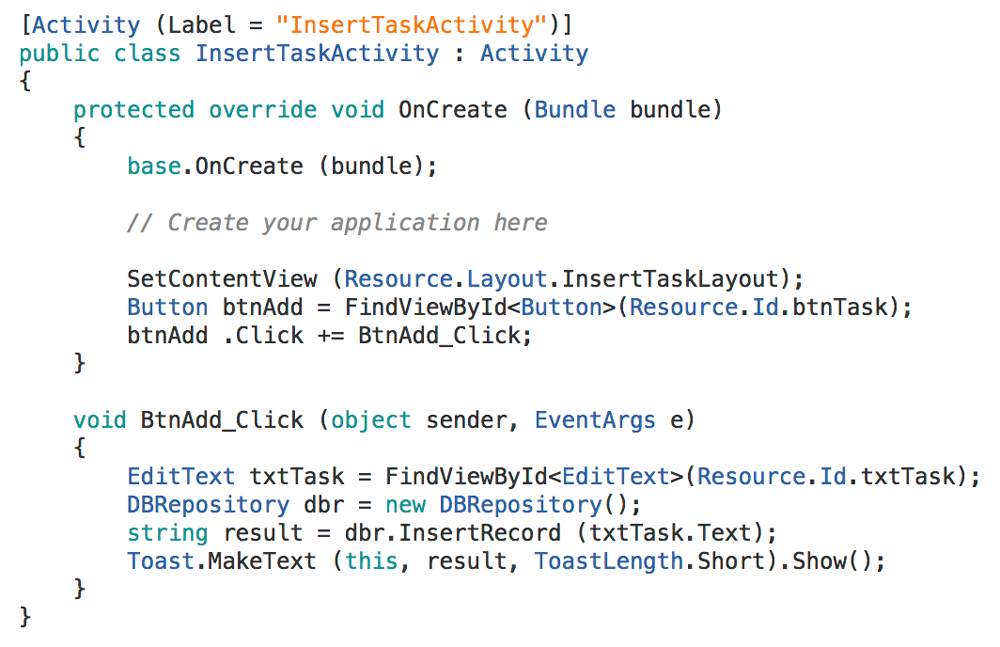
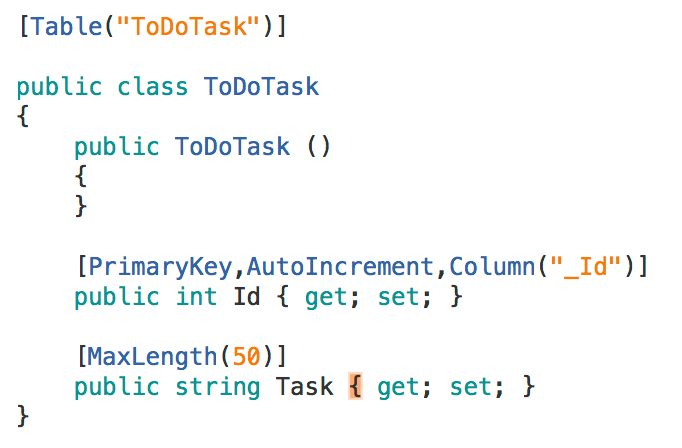
For this a new activity script had to be created as well. [Refer to Image 5 & 6] A new class for
creating a table was created. It basically gave each record (text information) that would be saved
within a table an ID so every record can be identified and each record would have a max limit of 50
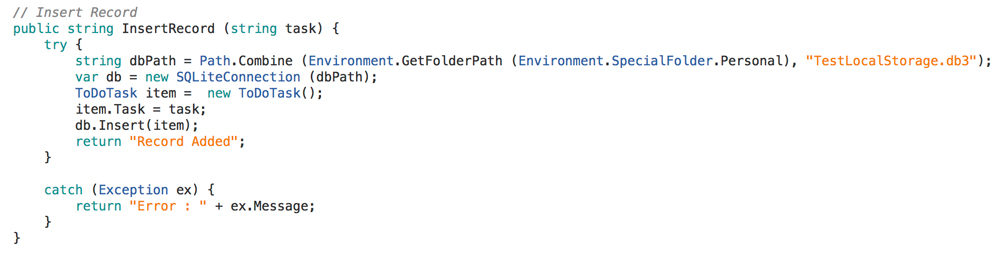
characters. [Refer to Image 7] After that, 2 new functions were added in the "DBRepository" script.
First was a function to create a table within the database that we created. The database was called
"TestLocalStorage.db". Second was a function to create a record within that table. [Refer to Image 8 & 9]
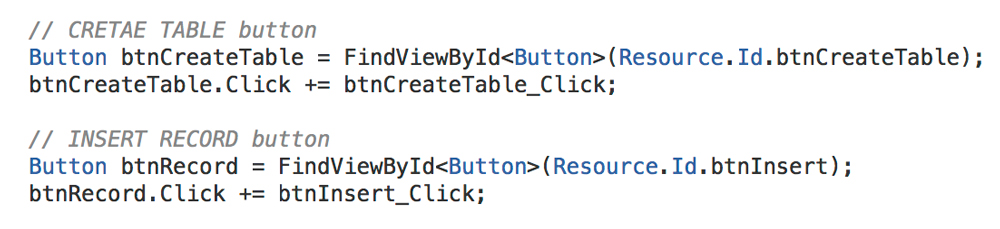
Going back to the main activity script, we have to add a command to each button "Add Table" and "Add Record".
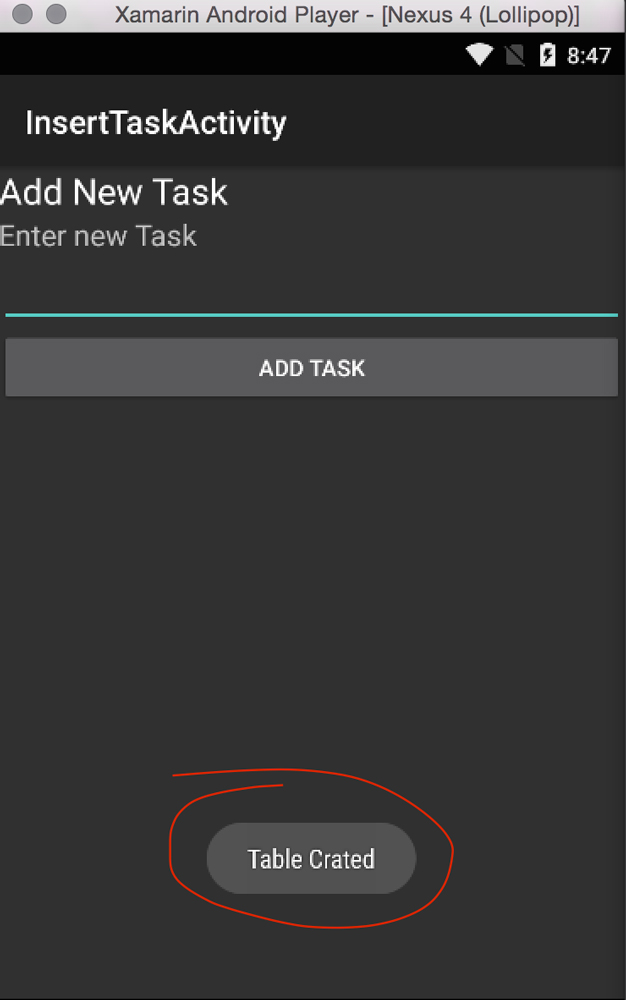
[Refer to Image 10 & 11] Now we had to check if it works. When we click on create table, it creates a
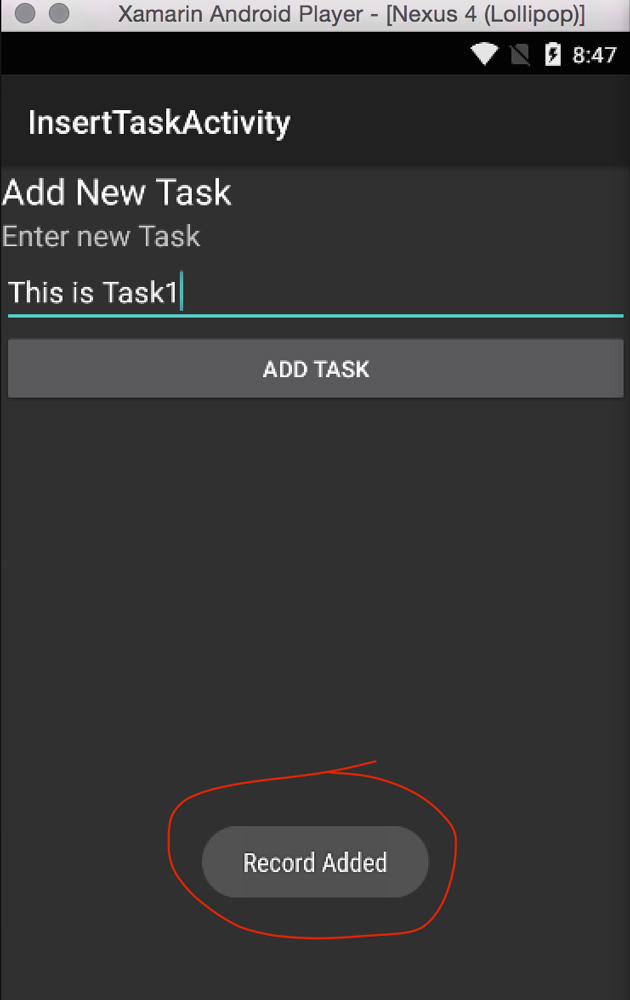
new table in our database. Then if the user tapped on insert record, it will open a new page where
the user can enter his/her record (text information) that would be saved. After the user enter
his/her text and taps on add task, that information would be saved. [Refer to Image 12, 13 & 14]
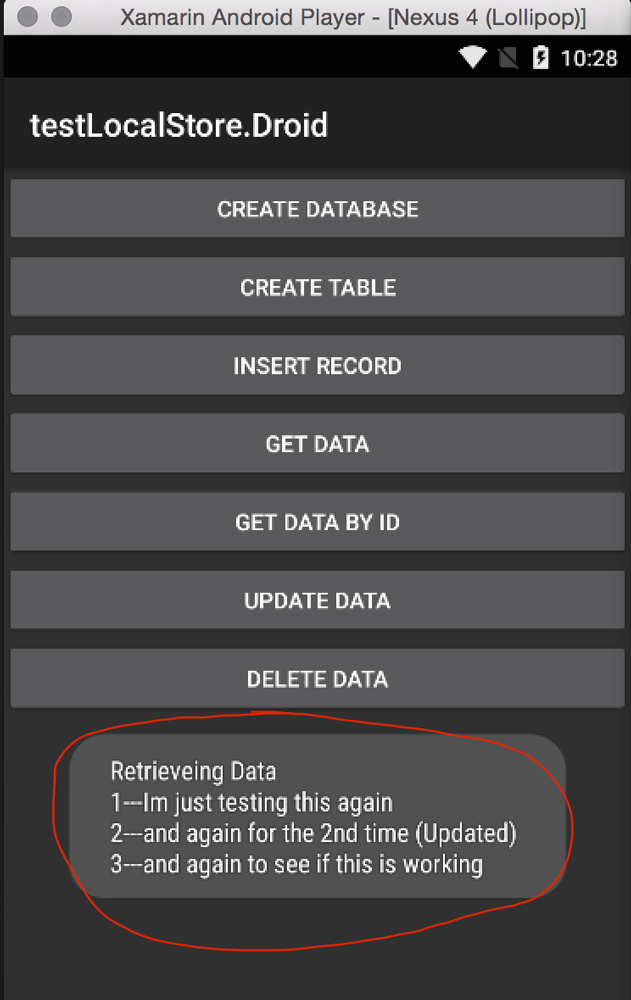
Then a new function was added in the "DBRepository" to retrieve data from the database. [Refer to
Image 15] A new command was added to the button "Get Data" so it could retrieve data and display
it in a mini pop up message that would appear and then disappear after few seconds. [Refer to Image 16 & 17]
Later I checked if this was working and it worked perfectly. [Refer to Image 18]
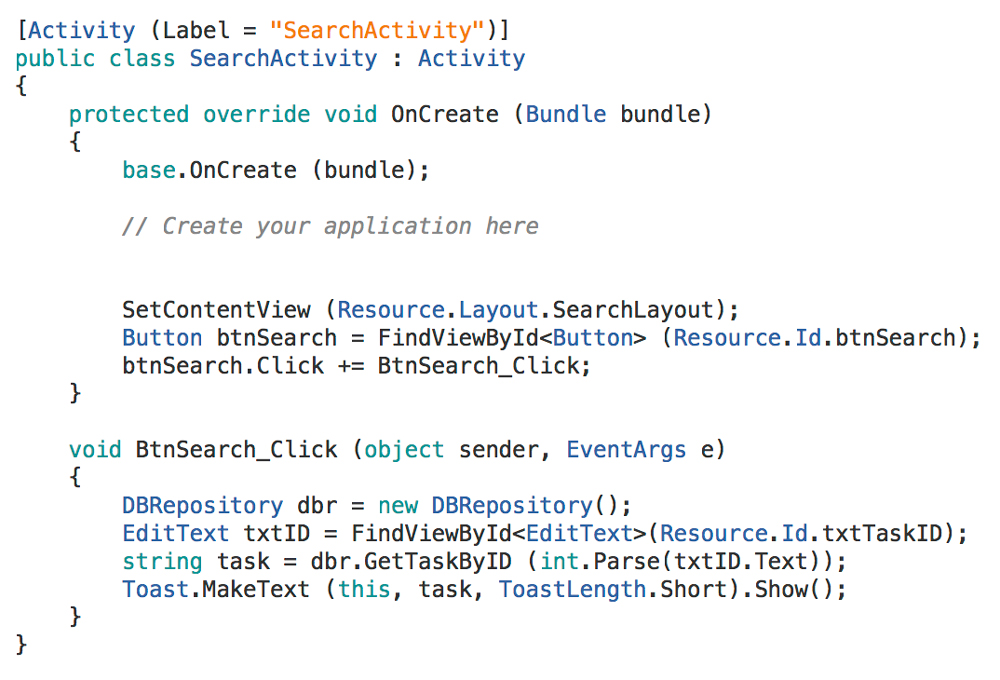
Now I had to search data by it's ID. So for that I had to create a new page where the user would type
in the record ID and the app would find and display the search result. As this was a new page a
new activity script was to be created. [Refer to Image 19 & 20] Then a function was to be added
into the "DBRepository", which basically searched the database with the ID that was entered by
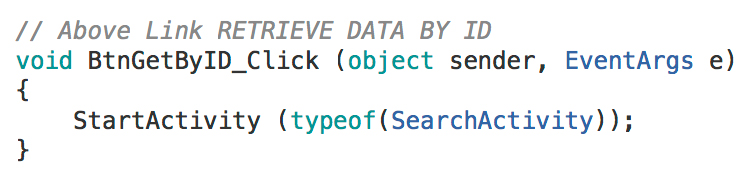
the user and then returned the value associated with that ID. [Refer to Image 21] Again an action
was to be created for "Get Data by ID" which would open the Search by ID page and when the user
taps on the search button after he/she enters the ID. [Refer to Image 22 & 23]
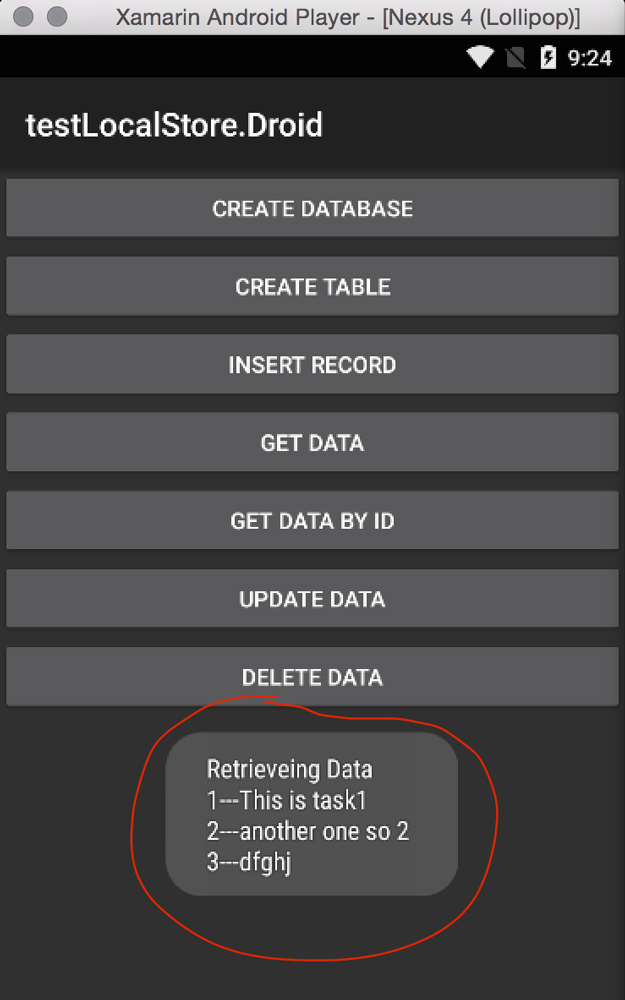
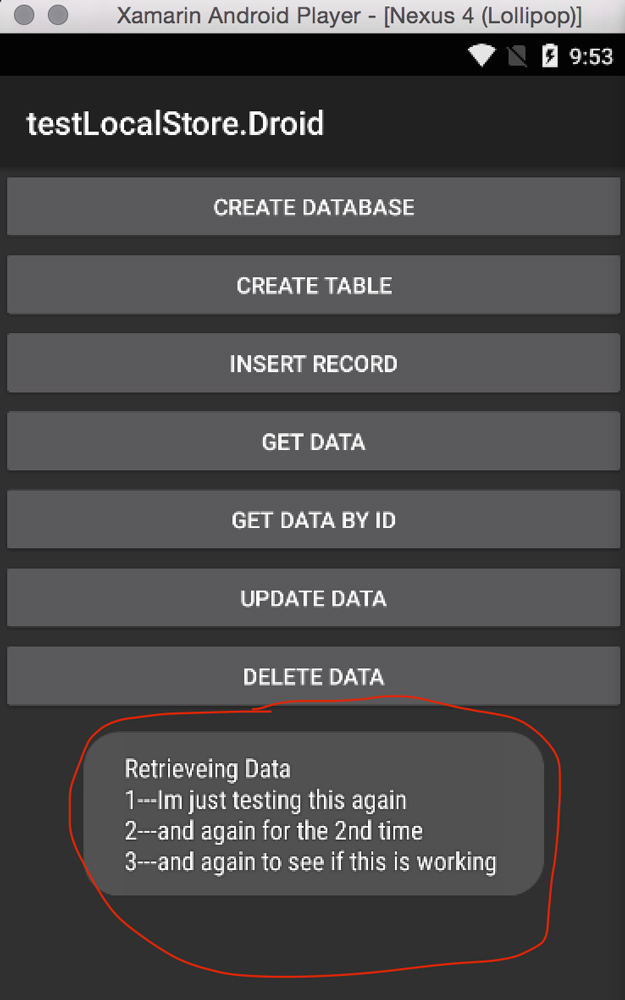
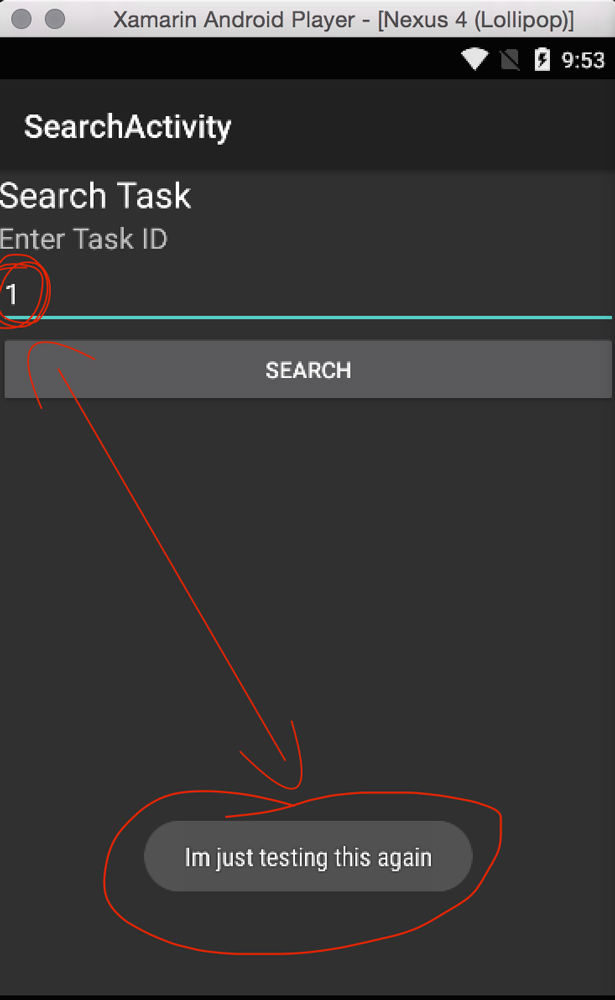
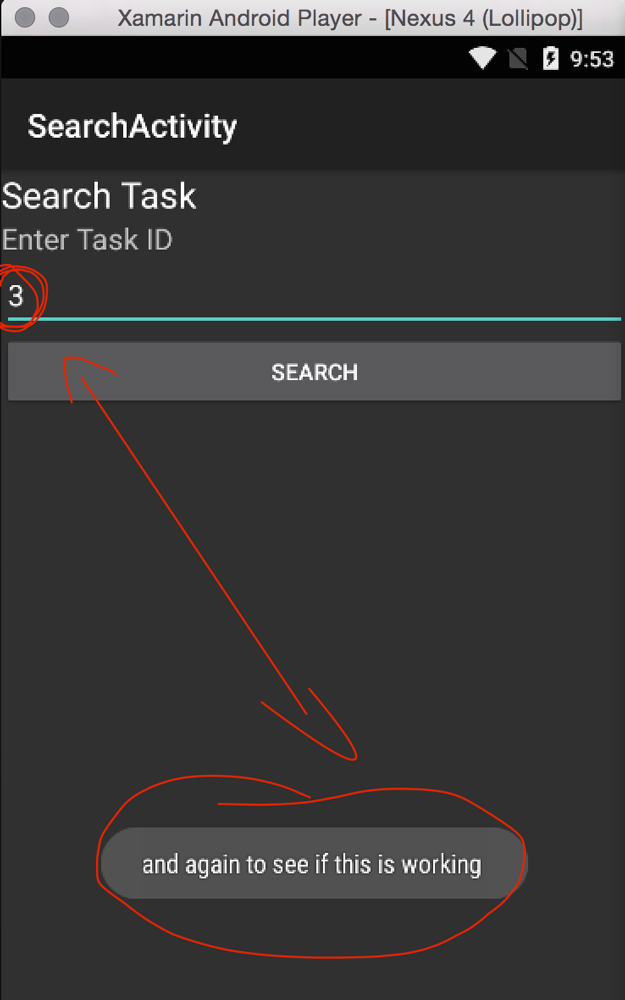
To to check if it was working I created a new database with information. [Refer to Image 24] Then I
searched the database with record ID and it displayed me my record associated with that ID.
[Refer to Image 25 & 26]
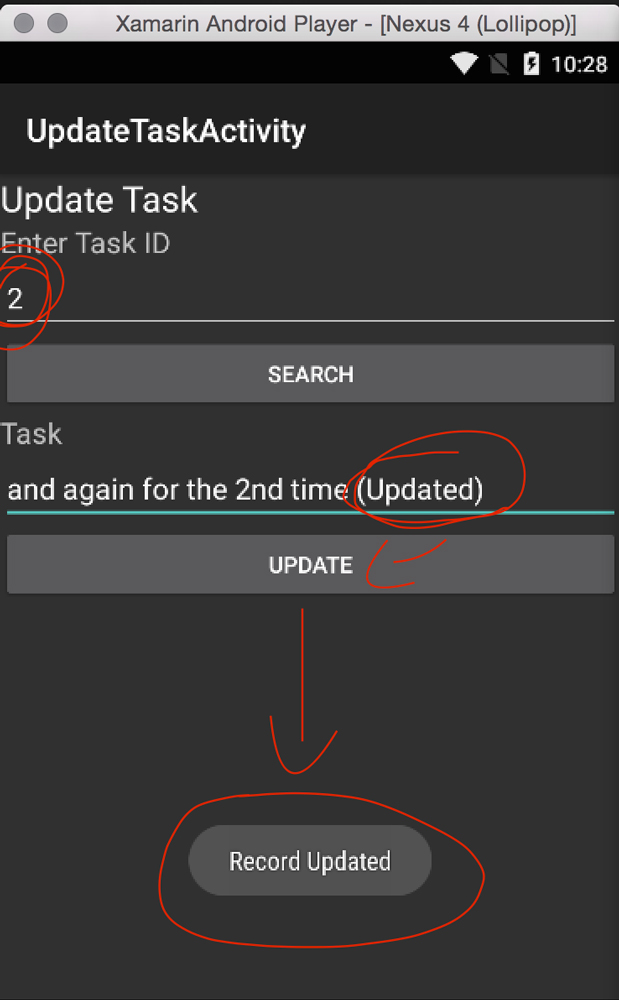
Now I had to create a functionality for the app so that the user could edit and update their
record that they saved. For this a new page had to be created along with a new activity script.
The activity script basically says that first the user is going to search the database according
to the record ID. The user types in the record ID and taps search. The app will search the database
and display the search result into a textbox. Now the user will be able to edit the text that they
saved previously. When they tap "Update", the app would update the text. [Refer to Image 27 & 28]
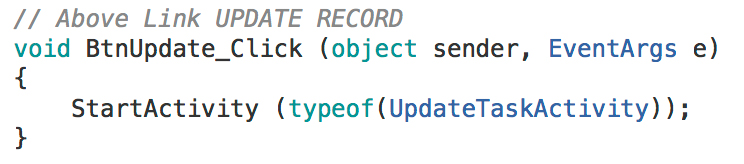
An update function was also needed to be added in the "DBRepository", so when the user taps "Update",
the app would update and save the Record. A command for "Update Data" on the main screen was needed
to open a new screen where user could search and update their record. [Refer to Image 29, 30 & 31]
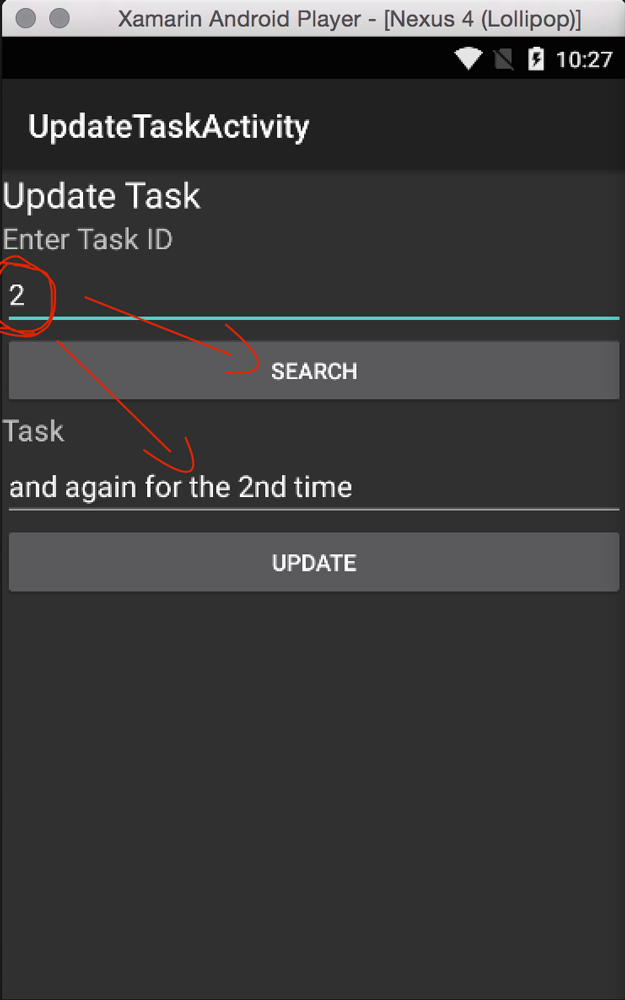
Everything was working fine. I entered 2 in the "Enter ID" textbox because I wanted to update by second record.
The app searched and displayed my second record. I successfully edited and updated my record. [Refer to Image 32, 33 & 34]
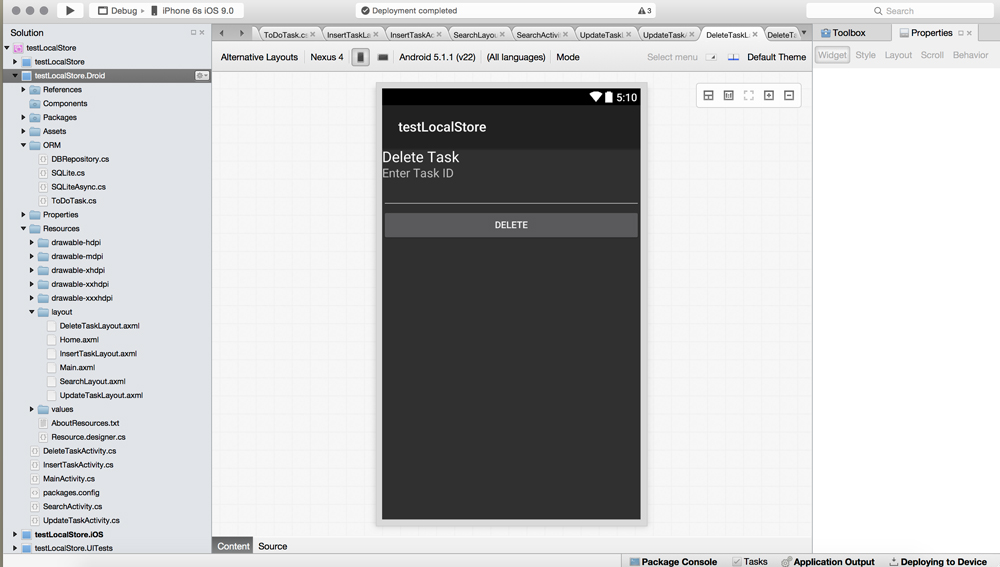
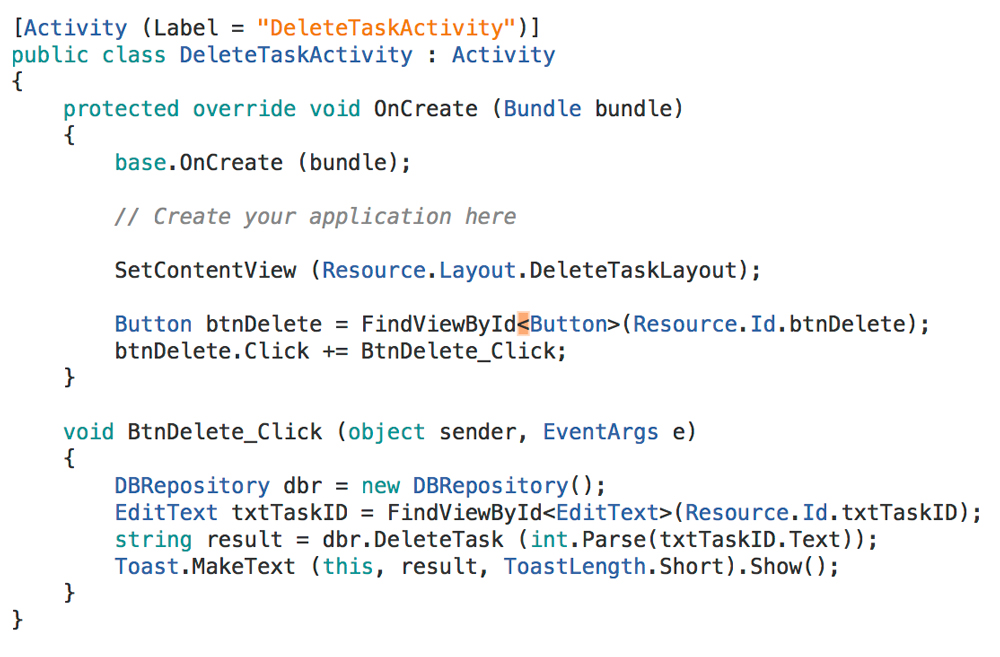
Finally, I had to figure out how to delete a record. The user would enter the record ID which they
would like to delete and when they tapped on delete record, it would delete that record from the table.
Firstly, a new page had to be created along with a new activity. A new function was also created for
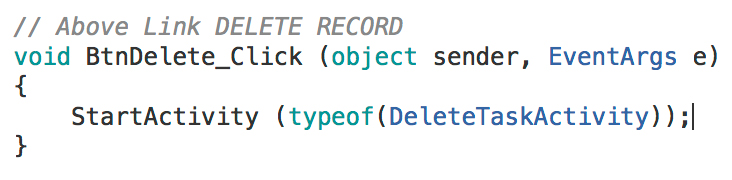
this functionality in the "DBRepository". [Refer to Image 35, 36 & 37] A command was added for the
button on the main screen to open the delete record page. [Refer to Image 38 & 39]
I checked if it was working and it worked perfectly. I searched the database with the ID and tapped
on Delete Record. Then I went back to the main menu and tapped on Get Data. The record ID I entered
to delete was deleted successfully. [Refer to Image 40 & 41]
The above was my tests with Xamarin. It gave knowledge about how to create and access databases.
I briefly learnt about SQLite.
Moving away from Xamarin
Simultaneously during my lectures, I was also learning about posting and retrieving data from an
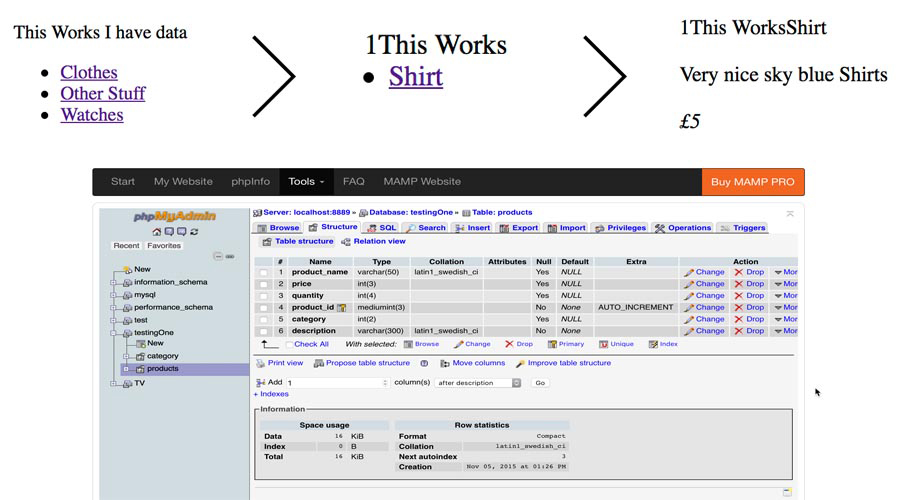
online database which would be my next step. During my lectures I learned a little bit of PHP and
briefly about MySQL. [Refer to Image 42]
Image 42
While testing my skills with Xamarin, my lecturer suggested that instead of using Xamarin
I use the Ionic Framework. Its more efficient and easier to create an app with database
functionality. However, the scripting languages used where HTML, CSS and AngularJS. So I
decided to shift from Xamarin to Ionic Framework. My main reason to shift was that there are a
lot of resources for Ionic framework than Xamarin. Even though I had never user AngularJS before,
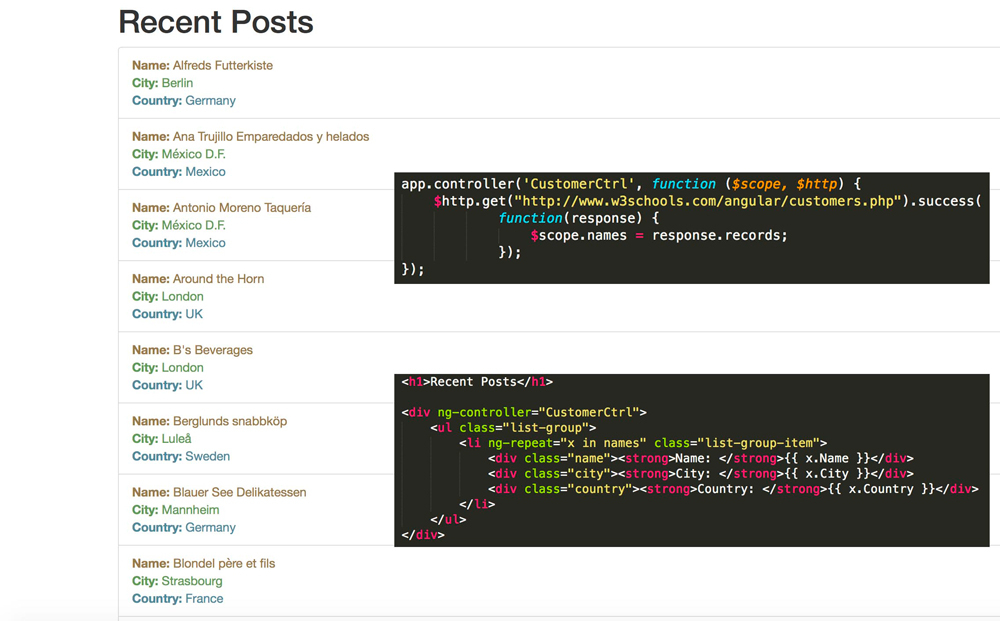
I was still more confident about this than Xamarin. My lecturer showed me how to retrieve data
from an online database using an API, and calling it from AngularJS and displaying it. It very
simple and very much needed as later I would be displaying School information, user profiles and
all sorts of data. [Refer to Image 43]
Image 43
Development with Ionic Framework
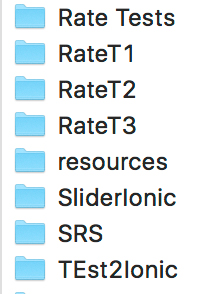
First I had to go though a lot of testing as to understand how Ionic framework works.
I created a lot of testing projects. [Refer to Image 44]
Image 44
Ionic gives 3 templates from which the developer has to choose one. 1st is a sliding menu bar,
2nd is a bottom footer for navigation and 3rd is a blank project. What I needed for my project
was to incorporate the 1st and 2nd template into one as I needed both features. So I always
created a blank project and started from scratch.
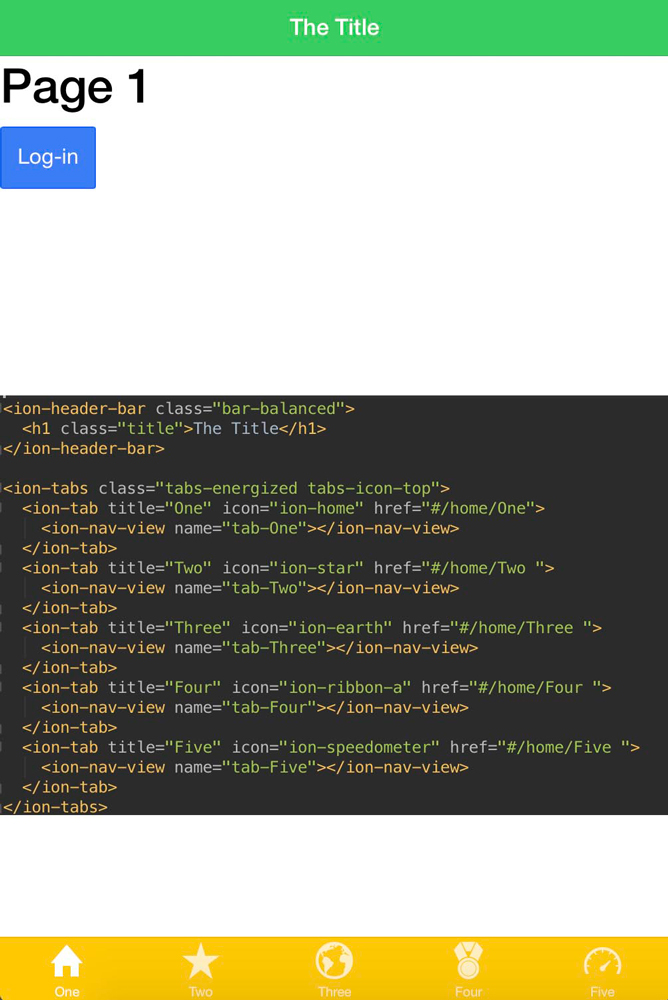
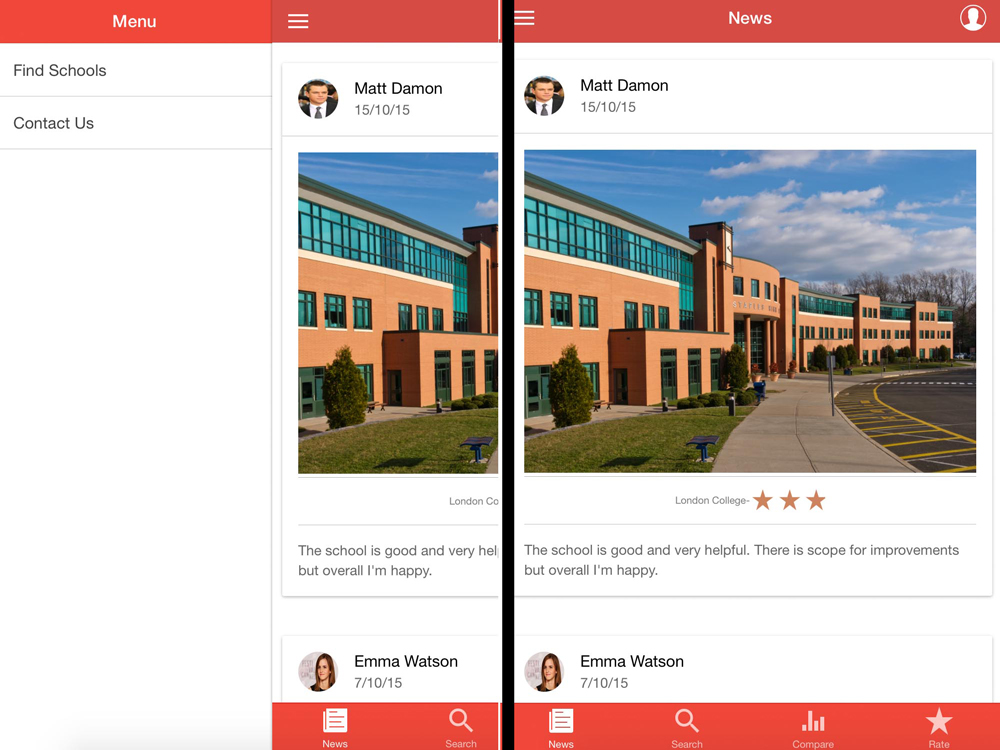
First I learnt how to make a sliding menu [Refer to Image 45] and then I learnt how to make a
footer menu. [Refer to Image 46] This is so that I could understand and mix them efficiently
and properly rather than using the template and messing everything and not understanding.
When I understand how to create them separately I merged them. [Refer to Image 47]
To add the routing system, I had to create separate pages for different pages and link them up
using "$stateProvider" and "$urlRouterProvider" in AngularJS. [Refer to Image 48] What this
means is that if the user wants to go to a different page, there needs to be a path defined for
the app know where to go. For e.g. if the user wants to go on the search page, I need to explain
the app where can it can find the search page and keep displaying the header and footer no matter
which page the user goes to so they can navigate. The header has the sliding navigation and the
footer has the footer navigation so the user can choose any page to view.
Image 48
Then I started applying and testing what I had learnt before. I found some dummy API's online
and started to display data in my project. [Refer to Image 49]
Image 49
Now I had to figure out to log a user in. This is the time where I start testing out my actual
web APIs that I need to use. I was not in charge of the backend (Server side) development.
The company provided me with APIs and I had to use them to perform tasks.
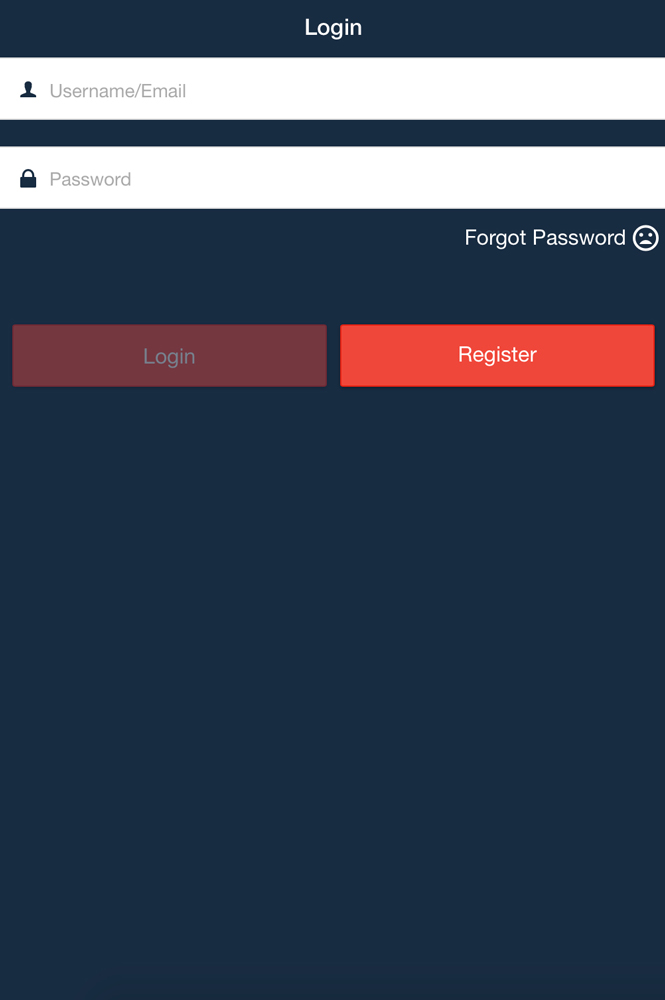
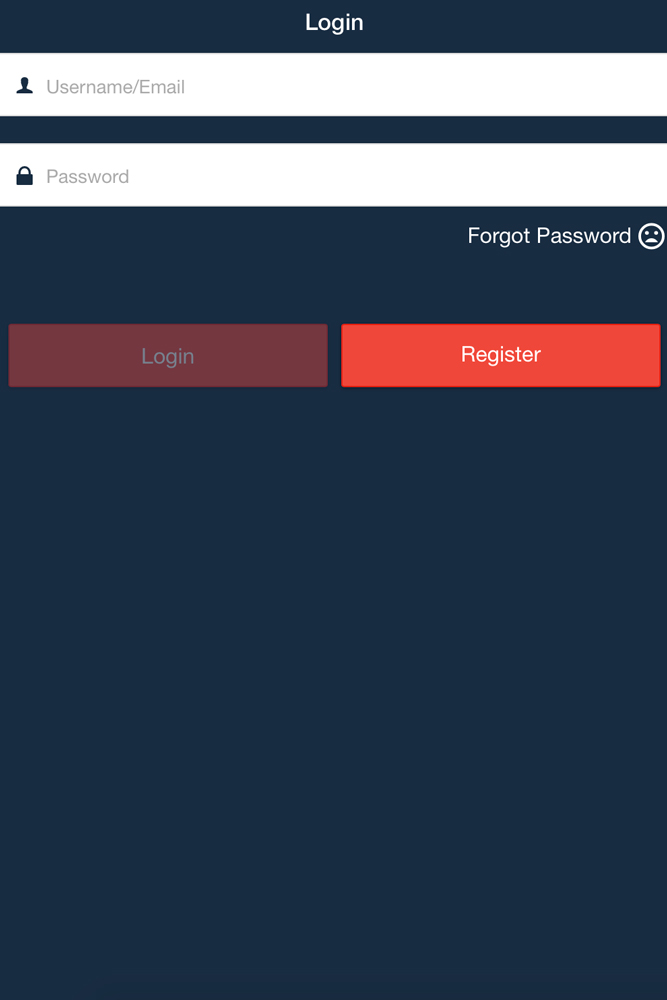
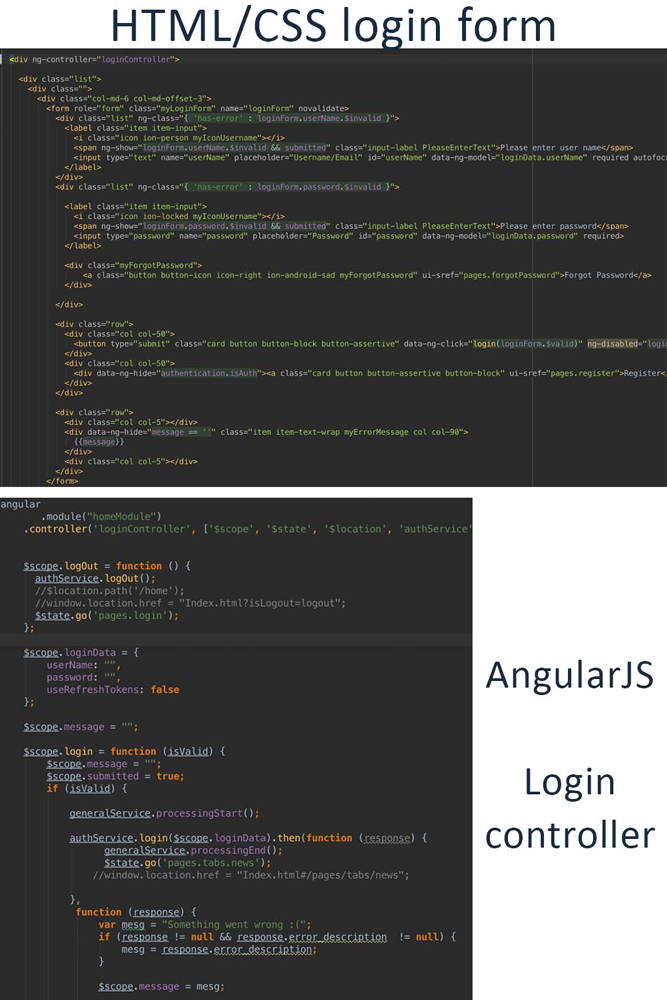
First I created a login page and created a form. [Refer to Image 50] My first attempt at making
the login service was to create a from and then submit the form. [Refer to Image 51] However,
the company I was working for did not want use this way to login. The second way or the way
they wanted me to login was to post the form using AJAX. [Refer to Image 52]
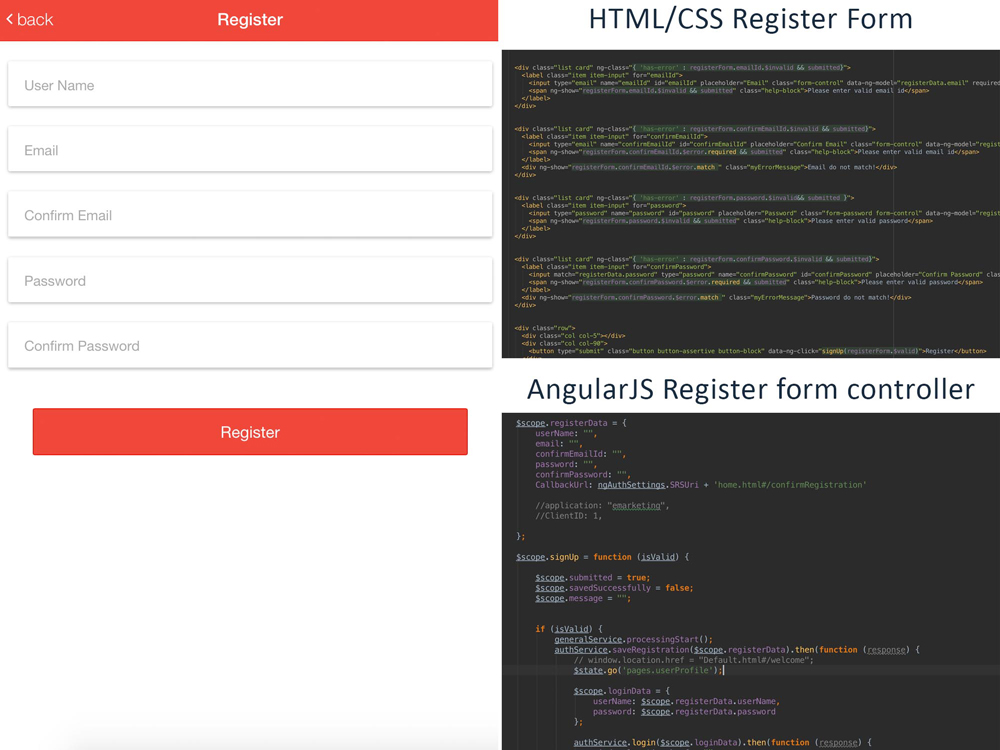
Using the same method, I created a Register form so a new user could register. [Refer to Image 53]
Similar method was used to create the Forgot Password functionality.
Image 53
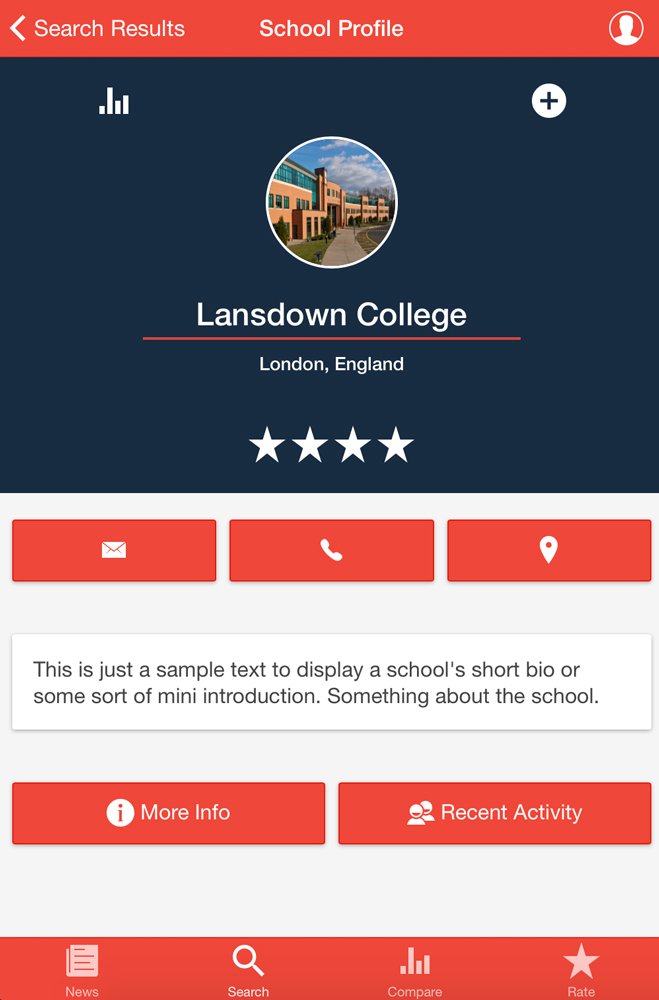
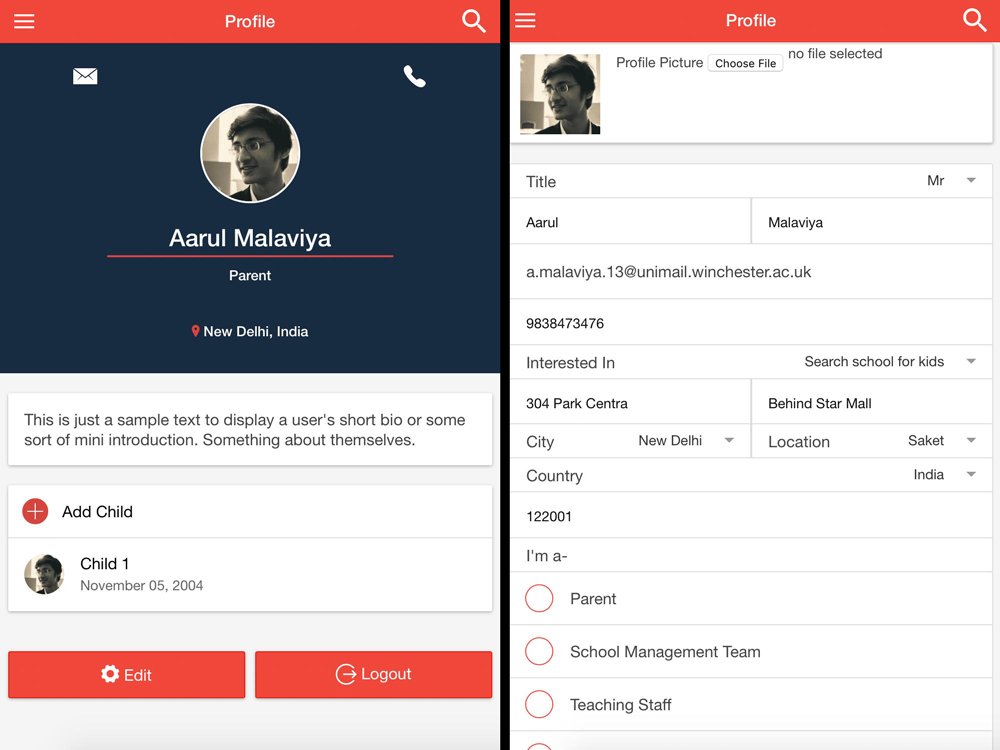
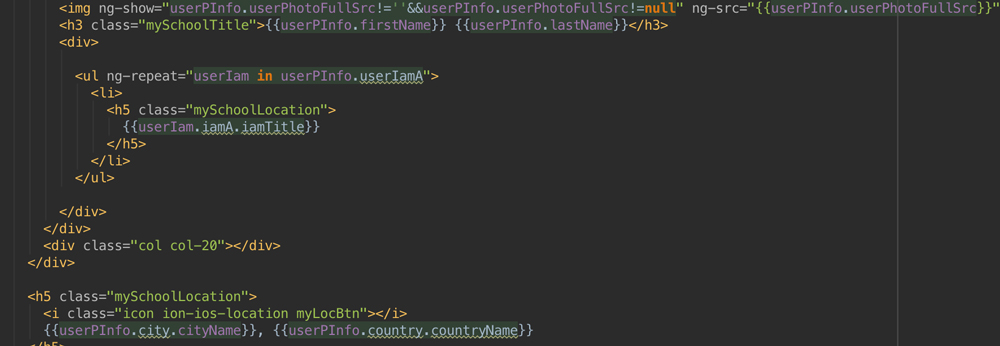
Now I had to display user's profile and allow them the ability to edit their profile details.
[Refer to Image 54] By using what I had learnt earlier about displaying data using a API, this
bit was quite simple for me. [Refer to Image 55]
Shifting to Design
I began understanding Ionic Framework and AngularJS but shortly after that I was told to hold the
development. The company I was working for wanted me to test a bunch of API to see if they were
behaving properly and creating a general proof of concept before they could begin actual development
of the app. The company like my ideas and design concepts so now they wanted me to do some design work for them.
While I was working on the development, I got 2 designers from my course to start working on
the designs for the app. They were also hired as interns. For reason unknown, both designers started
to cause delays in their work. Either they got busy with other work or found a better project to work
on according to them. So the company decided let them go. This really impacted the full development of
the project and caused sever delays as lot of time, the designers would be asked for the designs and
due to some issues the designs wouldn't be complete. So the app was becoming more and more solid from
the development point of view but the app still didn't have decent design. Hence the company deiced
to switch me over to design as I also have keen interest in UI and UX (User Interface & User Experience).
Design
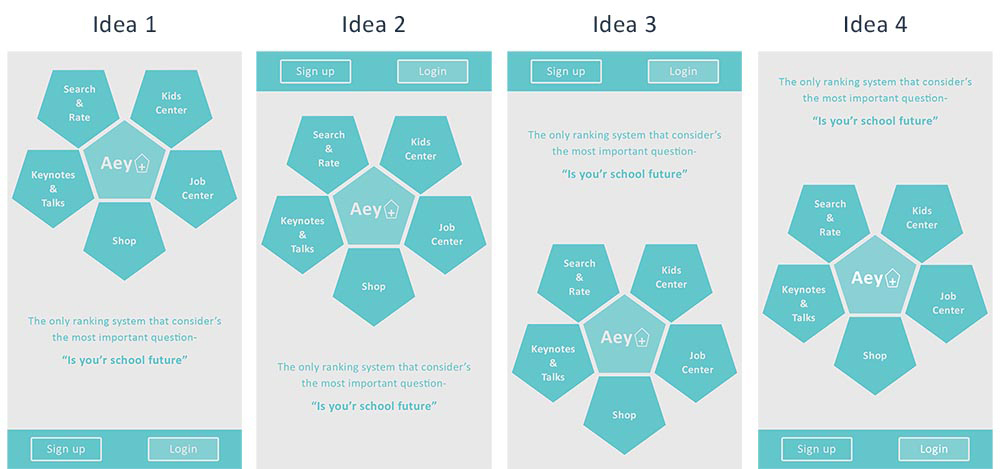
I started creating a login screen from them. The idea was that because
the user has downloaded the app for the firs time, they don't know what's it about and what it can do.
So I thought of this pentagon wheel. Each pentagon is a feature of app as I mentioned above while
explaining what the app was about. So when the user taps on a pentagon, a small description will
appear below it to explain the user about the app's purpose and basic features. Then below it is a
footer where the user can login or signup.
Later I tried experimenting with positioning of the buttons.
I went though with 3 more iterations and decided to keep my 4th iteration as my final one.
This is because it is easier for the user to press buttons if the buttons are towards the bottom
half of the screen. Especially with mobiles becoming so big, its difficult for the user to reach
the top of the screen with one hand. Hence I decided to put all the intractable material towards
the bottom half of the screen. [Refer to Image 56]
Image 56
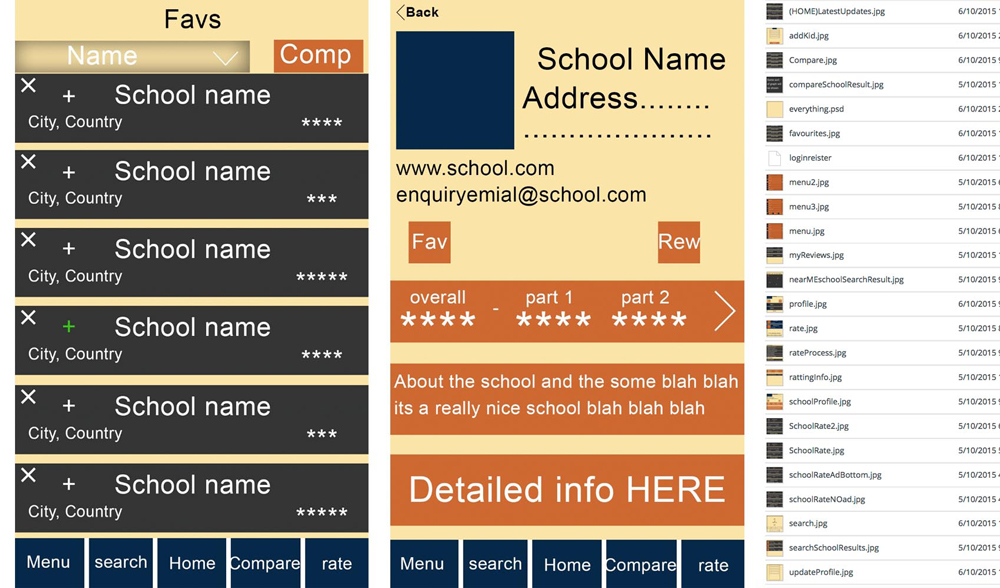
Before I got into the development off the app I created a full wireframe of the app for better
unseating on how the app works, what buttons are required in what screens and what is the purpose
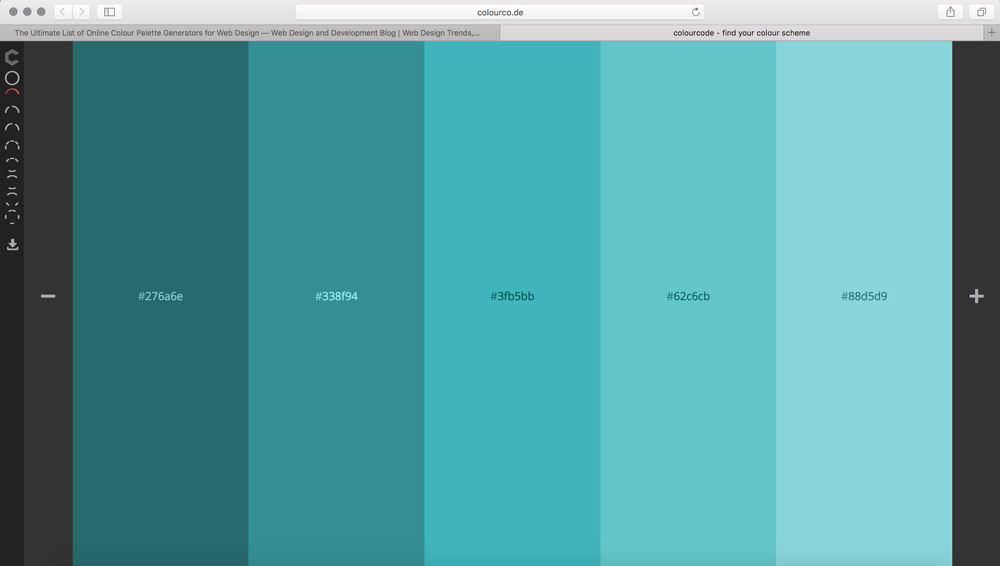
of those buttons. [Refer to Image 57] I used an online tool called 'Color Code'. It basically helps
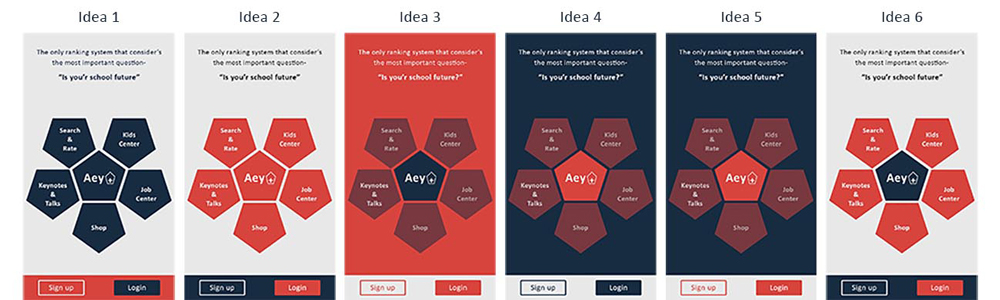
me to find a nice color pallet for the app. [Refer to Image 58] However, the brief I received
from the company gave me what colors to use so had to change my colors and I experimented around
with color I was provided. I flipped them around and tried seeing what looks good. I personally
like the 6th idea the best. [Refer to Image 59]
Since I made this before I began my development I decided to share this with designers I was
working with from my university, so it would be easy for them to understand the app and accordingly
they could create best designs suitable for the app. However, as I explained earlier due to unknown
reasons, both designers either started to show work below expected level or incomplete work.
Hence the company decided to let them go.
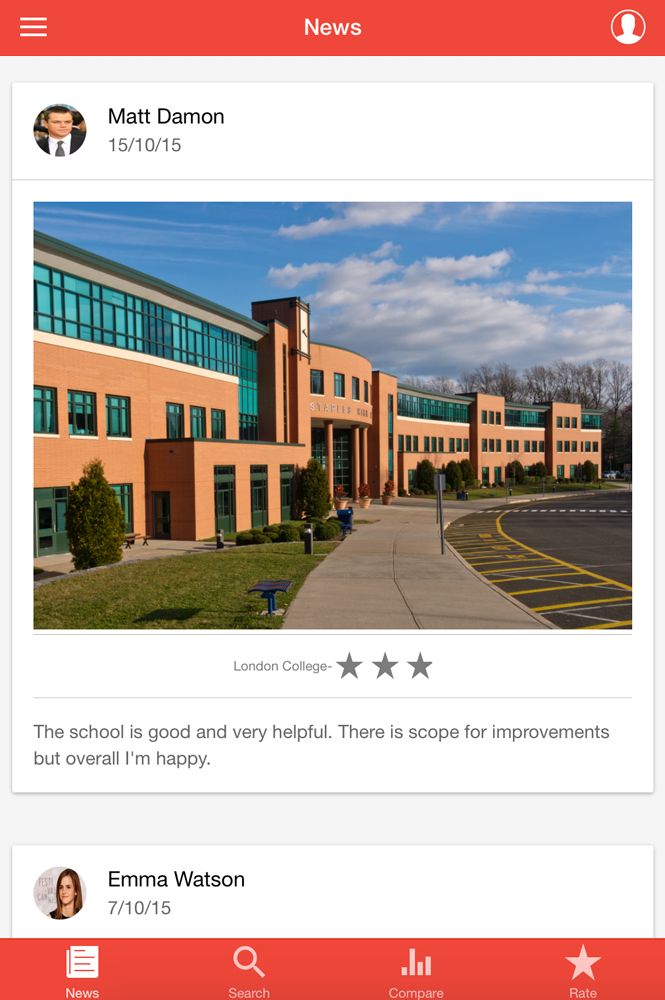
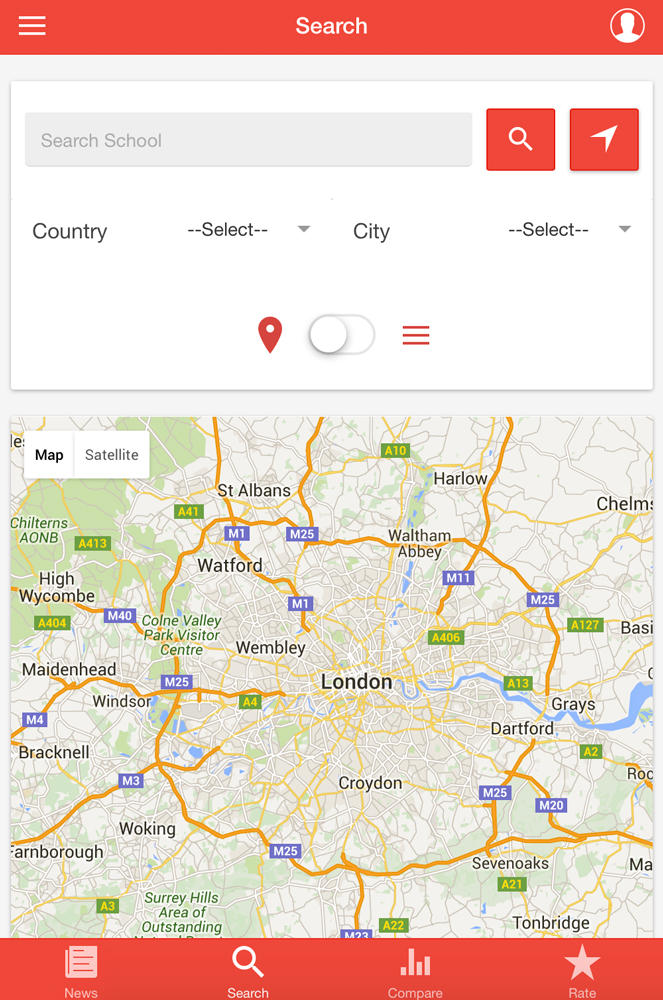
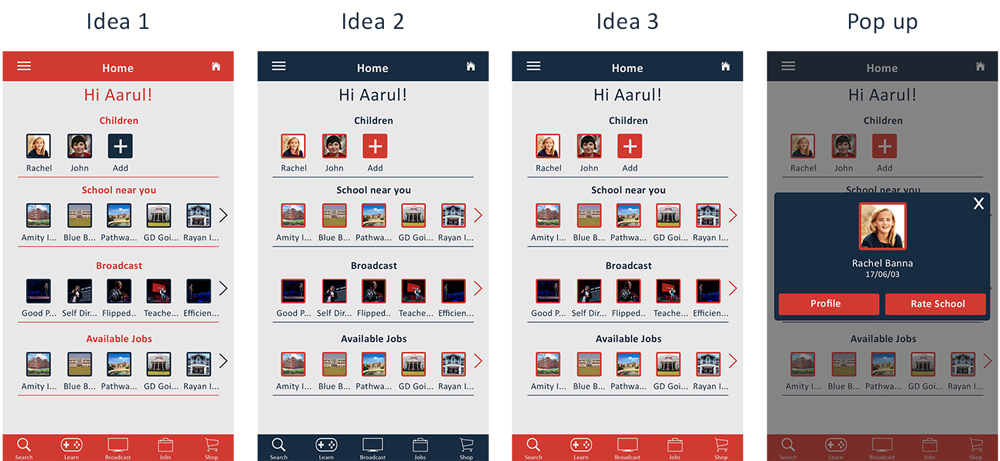
I had a design idea for home screen which comes after the the user has logged in. But I wasn't
able to think properly on this because now the semester was coming towards it's end and I was
running out of time. This was just home page proof of concept to show what I was thinking. [Refer to Image 60]
Image 60
Conclusion
I feel that this project is really interesting and app is a great idea and would like to
continue working for them over the next semester.
This project has taught me so much about interacting with databases. I have always wanted
to learn and get my hands dirty with it by creating an app that interacts with databases.
I have learnt about MySQL and SQLite. From trying to access a database in a device's local
storage to accessing, posting and retrieving data from a database halfway across the world
using web APIs. Not only that I have also learnt a new software called Xamarin and got play
with Ionic Framework. Got a lot of experience coding in C# and I also learnt to write a new
language, AngularJS.
I was an overall developer for this project (which is still under way). I have been a part of the
development, the UI, UX, app concepts, the core idea of the project and where it could lead to in
the future. I feel that this project had helped me gain experience in multiple aspects of digital
media industry that I am interested in.
File Structure
If I were to hand over the project, I will explain the file structure.
First you will find a folder called App. Under that you'll first find a Folder called Admin where
you will find scripts handled by the admin role. Then you'll find a folder called Pages.
Firstly, you'll find a NavPage HTML file (top sliding navigation) and a TabsPage (footer navigation)
HTML file. Within pages you will find a folder for every singe page and along with their HTML
file you'll also find the controllers for every HTML page.
Then you'll find a folder called Common which has the AngularJS scripts with all the services
for e.g. AUTH services for login.
Then in Contents folder there are some extra scripts they may be required. Some are in use but
most of them are not.
In the CSS folder you will fins the style sheet.
In the Img folder you will find images. I didn't use any images hence there will be a Ionic
logo in the folder (which is provided by default).
Lastly in the Lib folder are all the libraries for AngularJS. While coding we call a lot of
Ionic and AngularJS functions and they are all stored here. This is not a folder you want
to mess with unless you are a 100% sure of what you are doing. Best to leave that folder.