YourMapp
About the App
One of our lecturer's connected me and one of friend to a company called 'First Option Software'. The idea was to create a mobile app for iOS and Android. They had a concept of creating any room into a 3D mapping app so that it's easy for a user to navigate and know about a room or a building that they have never visited by playing around with a 3D version of it on their mobiles. So me and one of my friends were chosen by 'First Option Software' to create an intractable and informative 3D model of the Planetarium for 'The Winchester Science Centre and The Planetarium'.
Image 1
Unfortunately, due to lack of communication from the science center, the project was never finished and was left incomplete. However, me and my friend worked a lot on the project and at the end the day the project got nowhere which wasn't our fault. The project was underway when we received no direction from the Science Centre we decided to leave the project and move onto other projects. Hence you'll find unfinished work as the project was still under development when it was put aside.
Development
So the app needed to be simple. First we see a home page with 3 options, Explore, About and Credits. About and Credits page would just display some text and the title. It will also have a back button so that it could go back to the main menu page. [Refer to Image 2] This was achieved by enabling and disabling game objects. If the user taps on About, the main menu assets will be hidden and about information will be displayed, giving the illusion of entering a new scene. By this we decrease the rendering time and space as rather than creating 3 different scenes we have only used 1 scene, using less memory, it's quicker and takes up less storage space hence efficient. [Refer to Image 3]
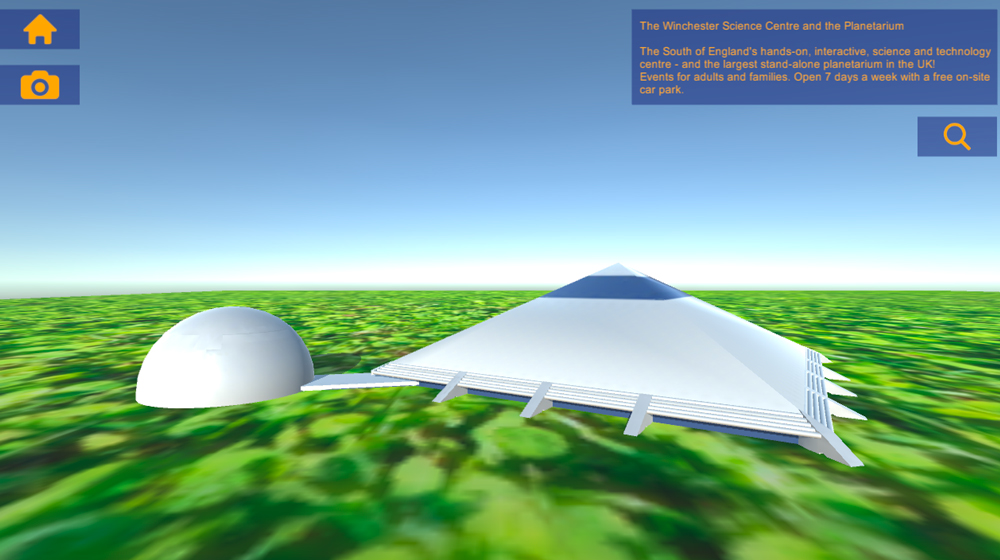
In the explore section the idea was that the multiple buildings at the Winchester Science Centre will be displayed as 3D models. The user will be able to look around, zoom in and zoom out in the general area. If the user clicks on a building a short description about the building will pop up along with a button which then takes the user inside the building selected. [Refer to Image 4] Inside the building the user will see different floors for e.g. Ground Floor, 1st floor etc. After you select a floor then you see different areas of the floor that will be mapped and labeled so that the user is familiar with all the areas of the planetarium before the user visits. [Refer to Image 5]
When explore is tapped a new scene opens with a 3D model of the planetarium created by my friend who was the designer in this project. There is a home and a camera icon on the left and when tap on the 3D model a description will appear on the right with a more info button on the right.
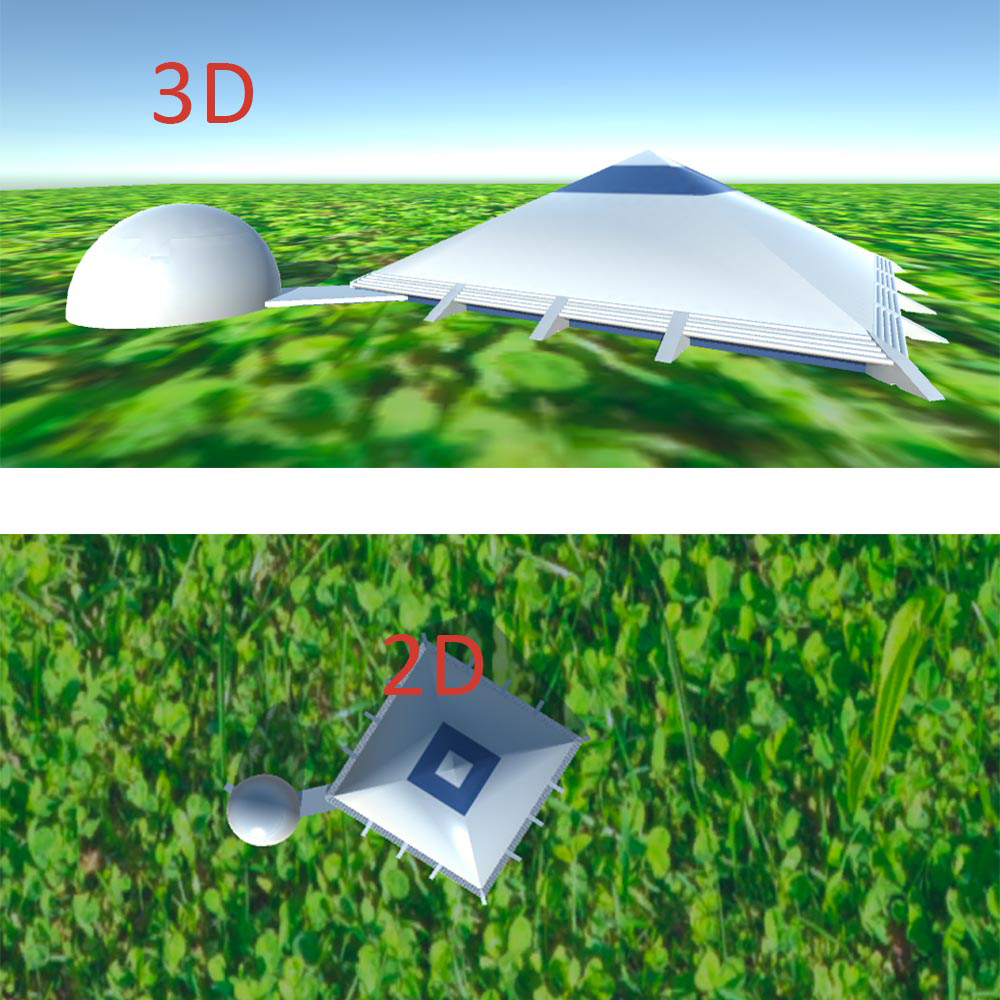
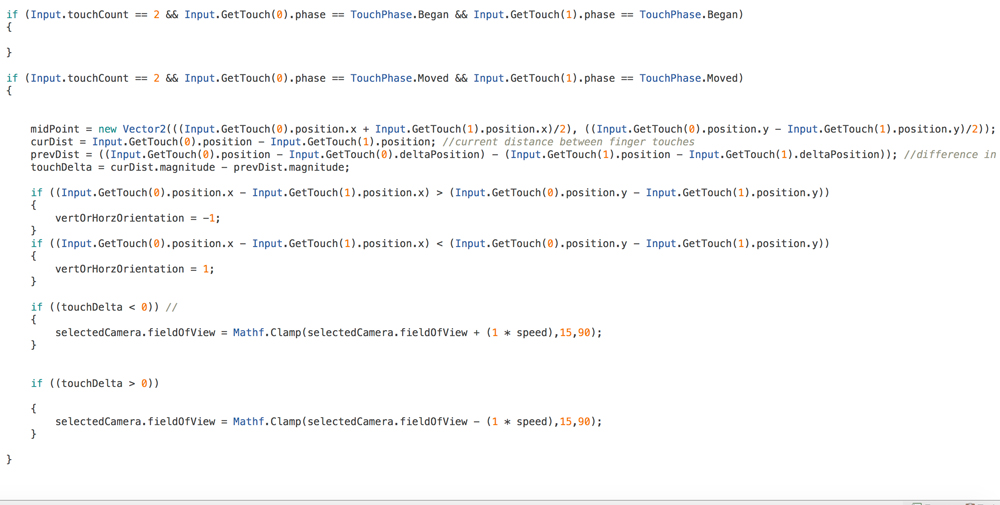
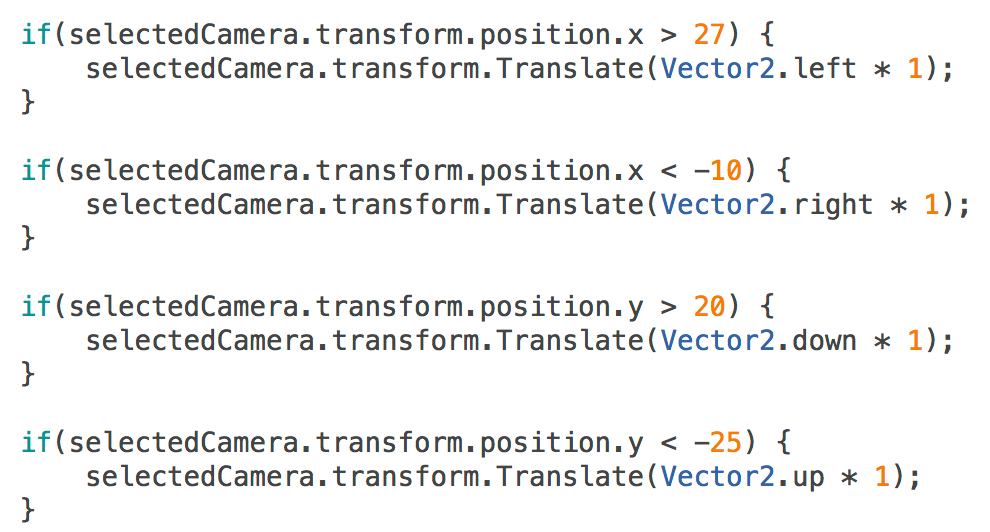
When home is pressed it takes the user back to the main menu page. If the user taps on the camera icon, it changes the perspective of the camera from 3D to 2D. [Refer to Image 6] In both views the user can pan around and zoom in and zoom out. [Refer to Image 7 and 8] I also added a restriction to the camera movement. This is so that if the user doesn't go off the map when exploring the area. If the camera goes beyond a certain point, then place the camera back to the zone. In my code I stated that if the X and Z coordinates go over or below a certain value then place the camera back to the edge of the map so that the user doesn't go beyond the map. [Refer to Image 9]
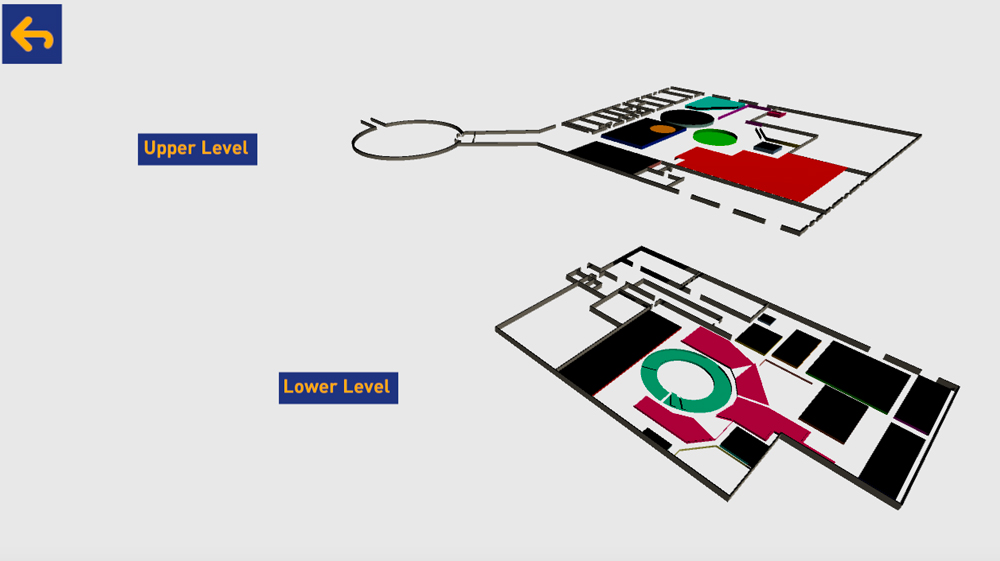
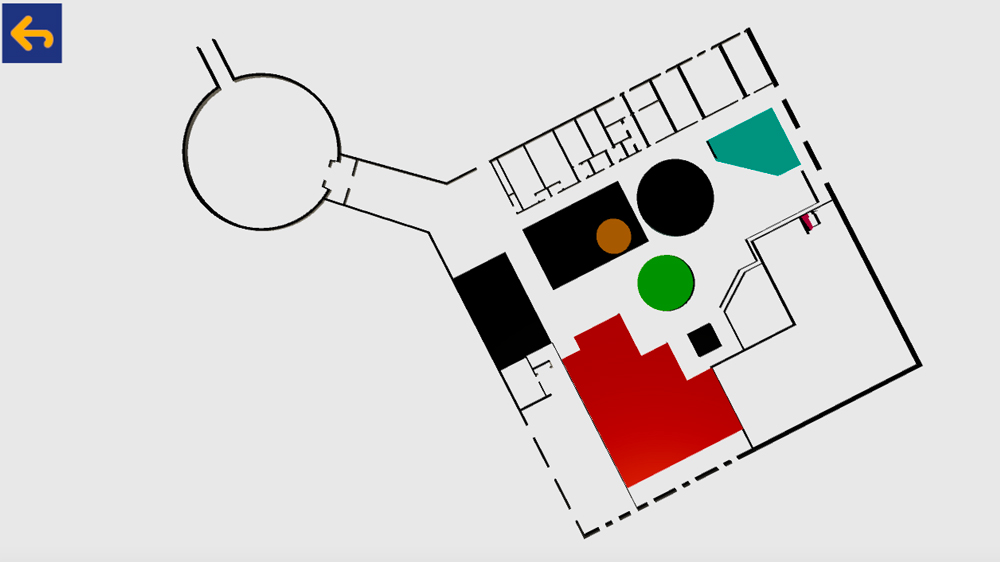
If the user taps on the 3D model, then they would see a small description and a more info button. If more info button is pressed, then the user goes inside the building. This was achieved though Application.LoadLevel. This opens a new scene with a floor plan for each floor in the building. Here the user will have the option to either explore the upper level or lower level. If the user taps on upper level, then a new scene would open with the upper level floor plan. [Refer to Image 10] The user will be able to pan around and zoom in & out just like before. The floor plan was suppose to be labeled but since we were still under development stage when the project was dropped by the Science Center. This application was a proof of concept and to see what exactly the Science Center wanted in association with First Option Software.
Image 10
I had also added some mini animations so that the project looked professional and gave the app a nice finishing touch for e.g. every time you wanted to explore inside the 3D model the floor plans will grow from small to big. This also happened when the description about the 3D popped up. It had a nice and smooth animation.
File Structure
If the project were to be transferred to someone else and if another developer wished to continue this project, the project assets are labeled and organized in a manner so that anyone can understand it.
This is a Unity project so if you open the main folder and find Assets folder, all the necessary assets are to be found there.
First you will find a 3D Model folder where you can find the 3D model of the planetarium and 2 floor plans. The file format for these 3D models is .FBX file. To add all the textures to the Planetarium building, there is a jpg in the assets folder called Cube. That is a necessary jpg file because if that file is not imported and only the 3D model is imported, the model will have no textures and colors.
Then you have the Animations folder where you'll find the animation that scales the 3D models from 0 to a defined size. This animation is planed when user goes inside the building and the floor plans emerge and grow from small to big.
Then we have the Fonts folder where the fonts are kept that were provided by the Science Centre.
You will also find an Images folder where all the icons are kept for the back button, more info and more.
Then you have the Materials folder which is created by Unity as it needs to convert the jpg textures to materials. You don't need to do mess with this folder. It is automatically managed by Unity unless you would like to add custom materials to any object or model.
Now you fill find the Scene folder where all different scenes would be placed. If someone would like to edit a specific screen of the they will have to edit these files.
You will also find a Scripts folder where all the scripts are placed for camera switching, zooming in and out, navigation to different scenes etc. All the scripts that have a "NAV" in them are the scripts that manage the navigation of the app for e.g. changing a scene or going back etc. Scripts with "CamZoom" in them are essentially the scripts that manage the camera movement and zoom in a zoom out for scene. Depending on the name you can tell if it is for the 3D model outside the planetarium or inside as they are labeled inside and outside Camzoom.